How to Repair and Restore Photos?
Restoring damaged images requires a high degree of technical knowledge. A JPEG file may get corrupted in a variety of ways. As a result, there are only a few organizations that specialize in repairing damaged images rather than just restoring the file system.
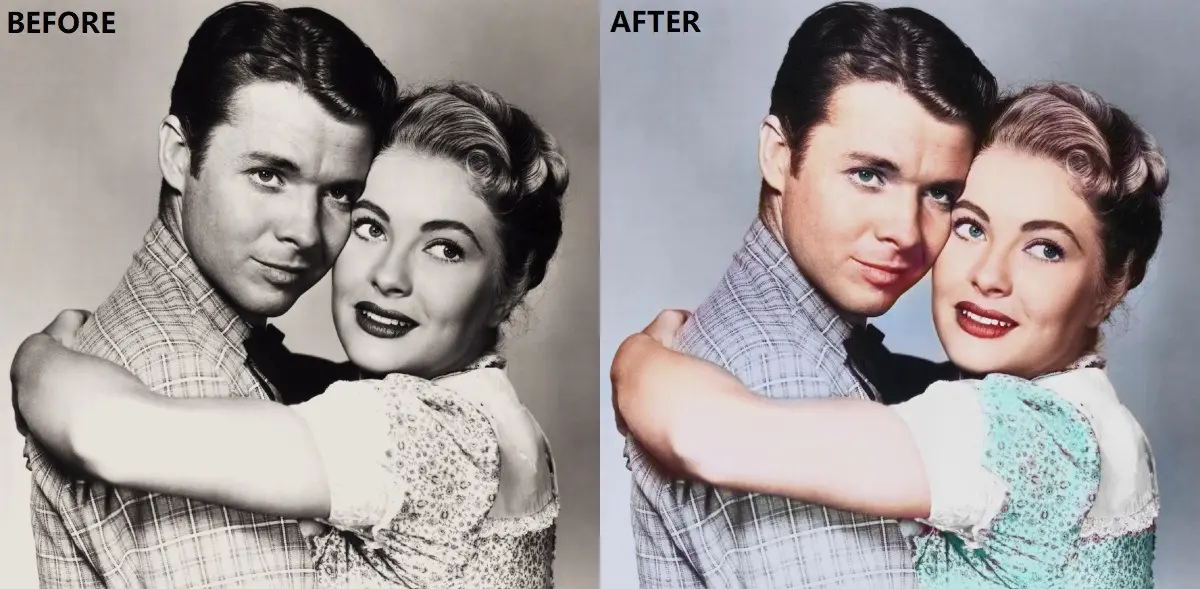
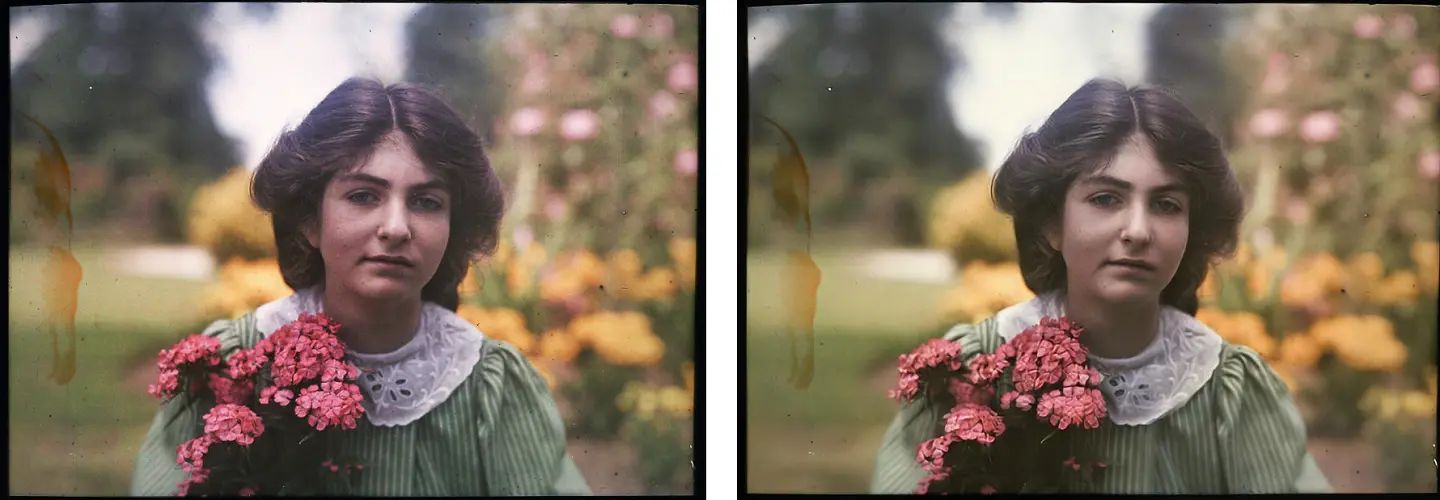
Repaired Photo using Pixbim Object Remover AI
People are increasingly transforming their old paper photographs into digital files that can be kept and viewed on computers nowadays. Pixbim Color Surprise AI is a computer application that colorizes black and white images automatically. Tainted photographs may be fixed with the right software.
This article significantly simplifies the process of using Pixbim to repair damaged images since we've incorporated all recommendations with thorough instructions.Here is the official link to download the software.
Why Is It Needed to Repair Photos?
In a JPEG scan, a little bit of mistake might cause picture distortions. The majority of the picture is accessible however, it has been altered and colored incorrectly.It's not uncommon to come upon a priceless vintage image that's been tattered in some way. Accidents happen, and since pre-digital photography only produced one print at a time, there's no way to duplicate lost work.
In our eyes, they are valuable, but they are also susceptible to all kinds of wear and tear. These faults may be fixed, depending on the degree of harm. The loss of famous pieces and photos is all too often owing to sloppy writing or camera malfunctions. While it's feasible to fix a damaged or old picture file if you know the appropriate steps to follow. That's why Pixbim is here to let you remember the good old days.
How To Repair Old Photos Using Pixbim?
We live in a technology-driven era, and it's probable that many of us are unaware of the appropriate products or software that can swiftly recover defective photographs. Let’s get on with the steps to be followed while using Pixbim.
Step 1: Loading the Image
The first step is to load the image into the driver. This goal can be achieved by clicking on the “LOAD Image” on the top right corner of the screen.
Step 2: Choosing The Image
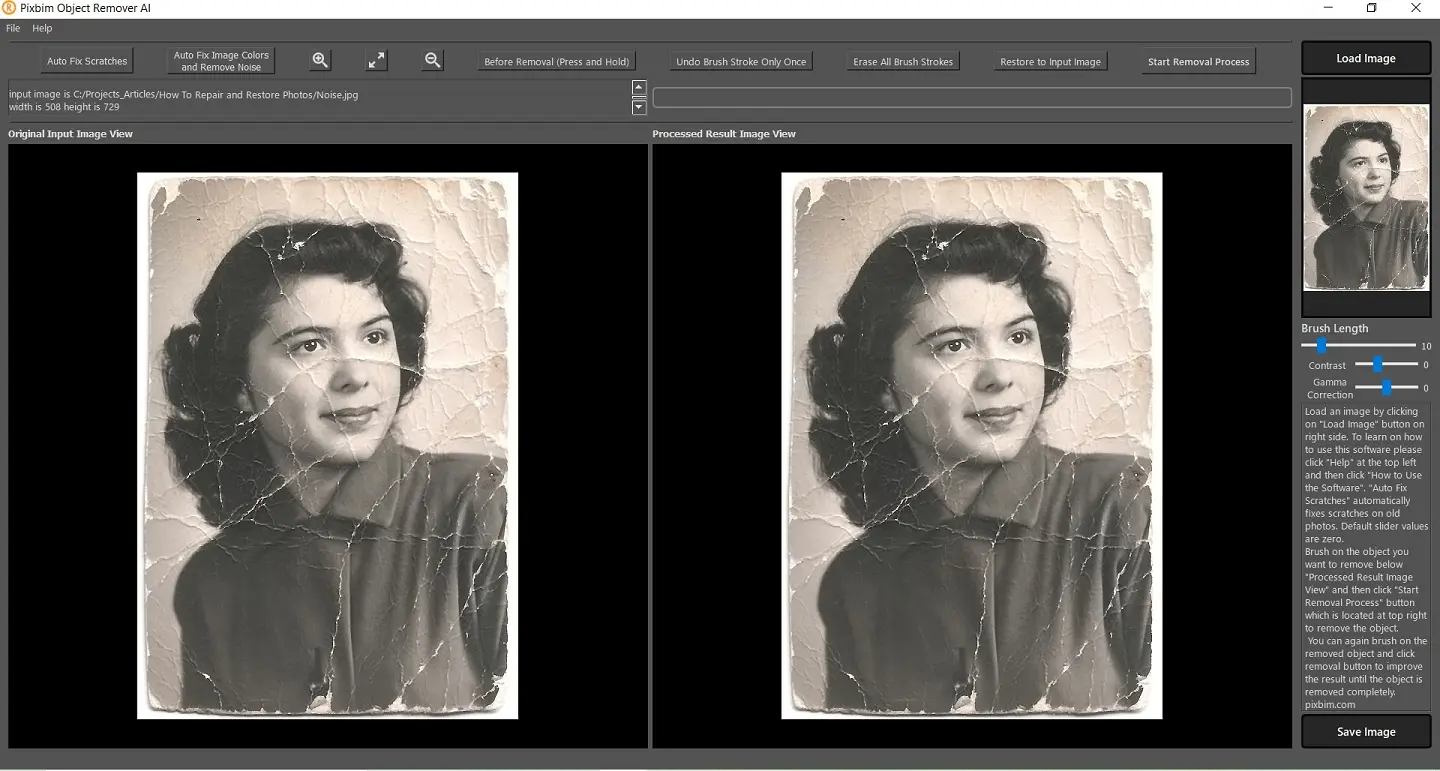
When you click on the "Load Image," a dialog box appears just like below, from where you can browse for whichever photo you may want to revive or edit. Click on it, and press Open.
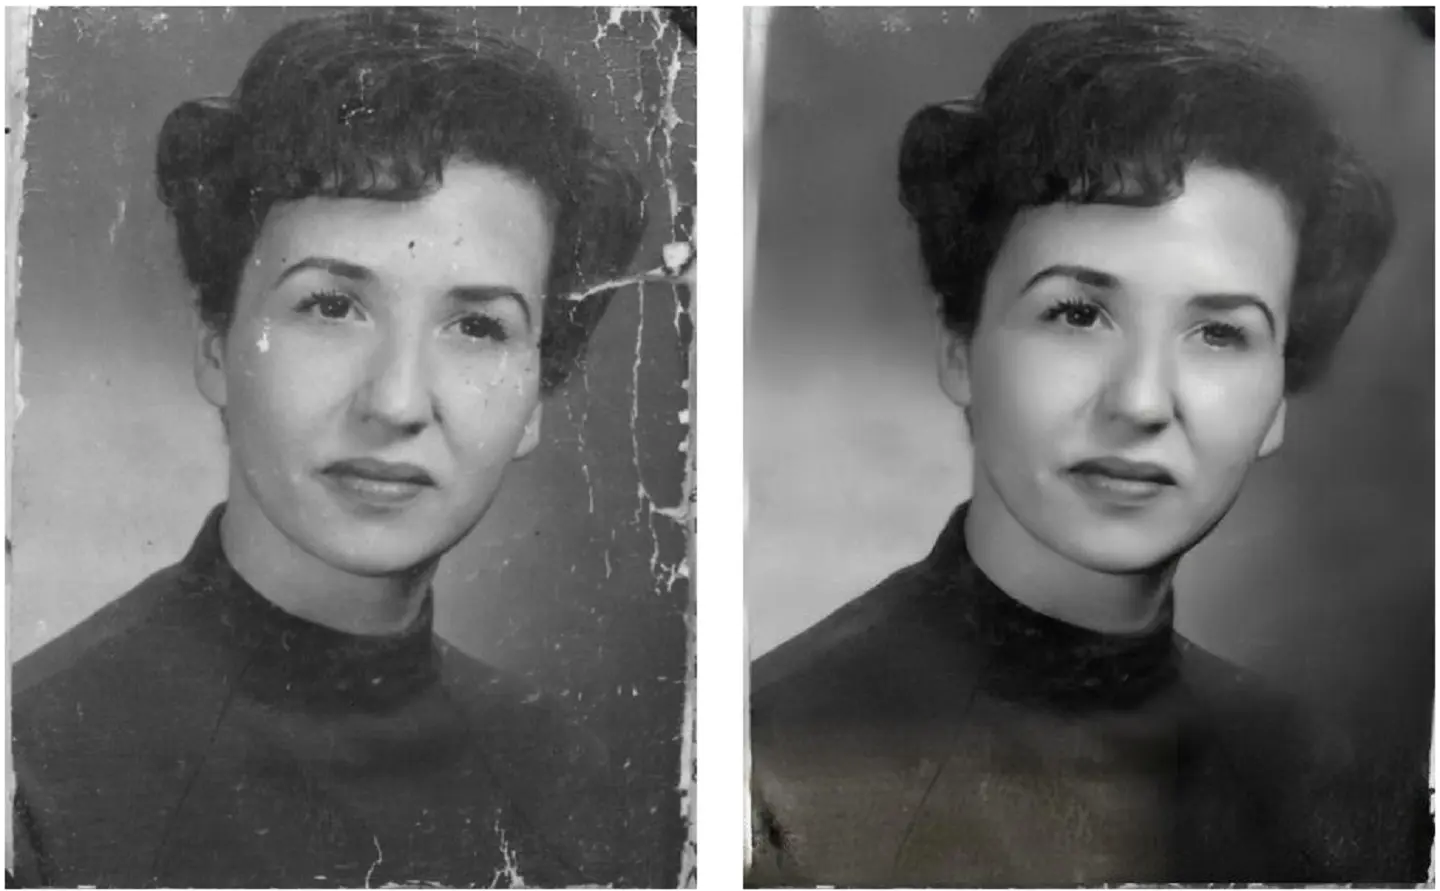
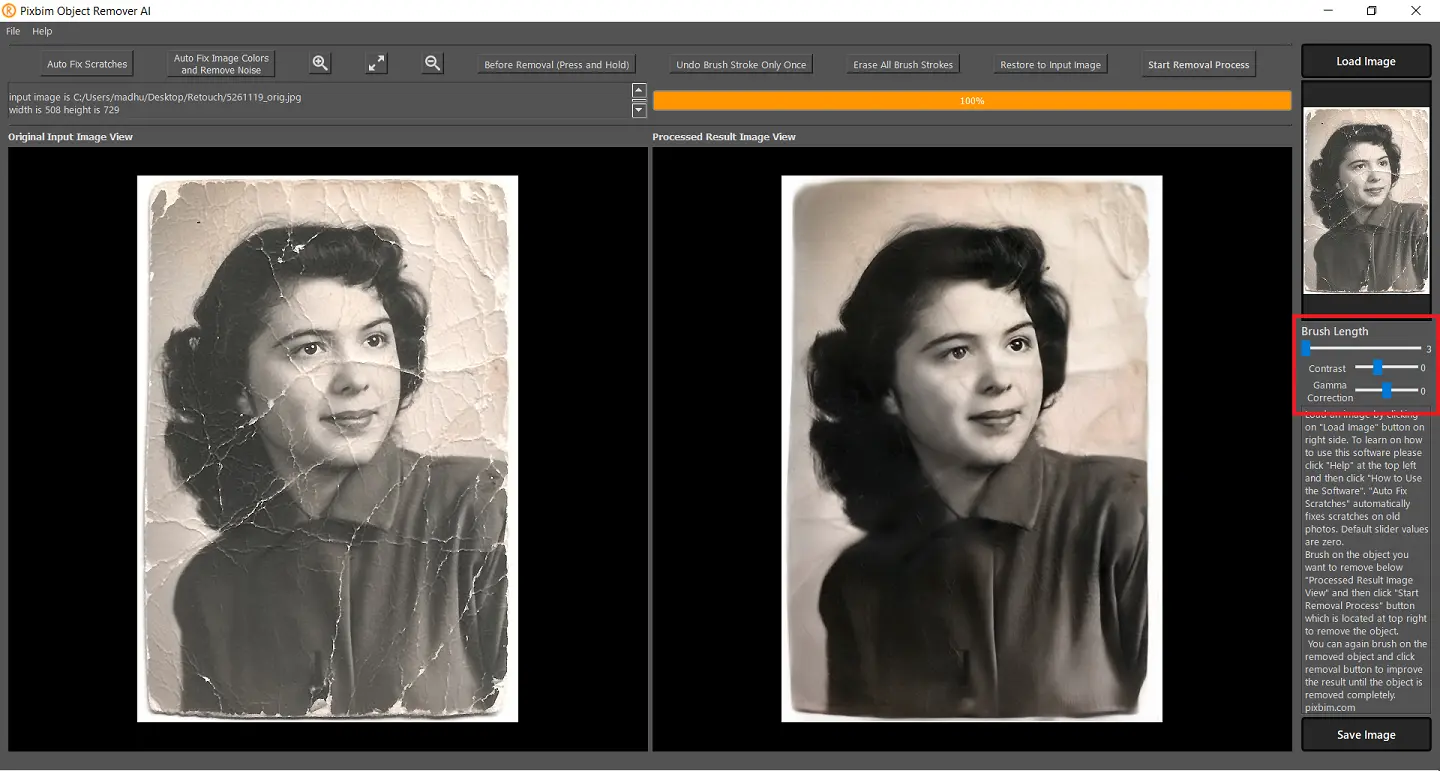
Input Image Loaded to software to be repaired.
To remove scratches, tears or spots on an old photo click the "Auto Fix Scratches" button as it automatically repairs old damaged photos using Artificial Intelligence.
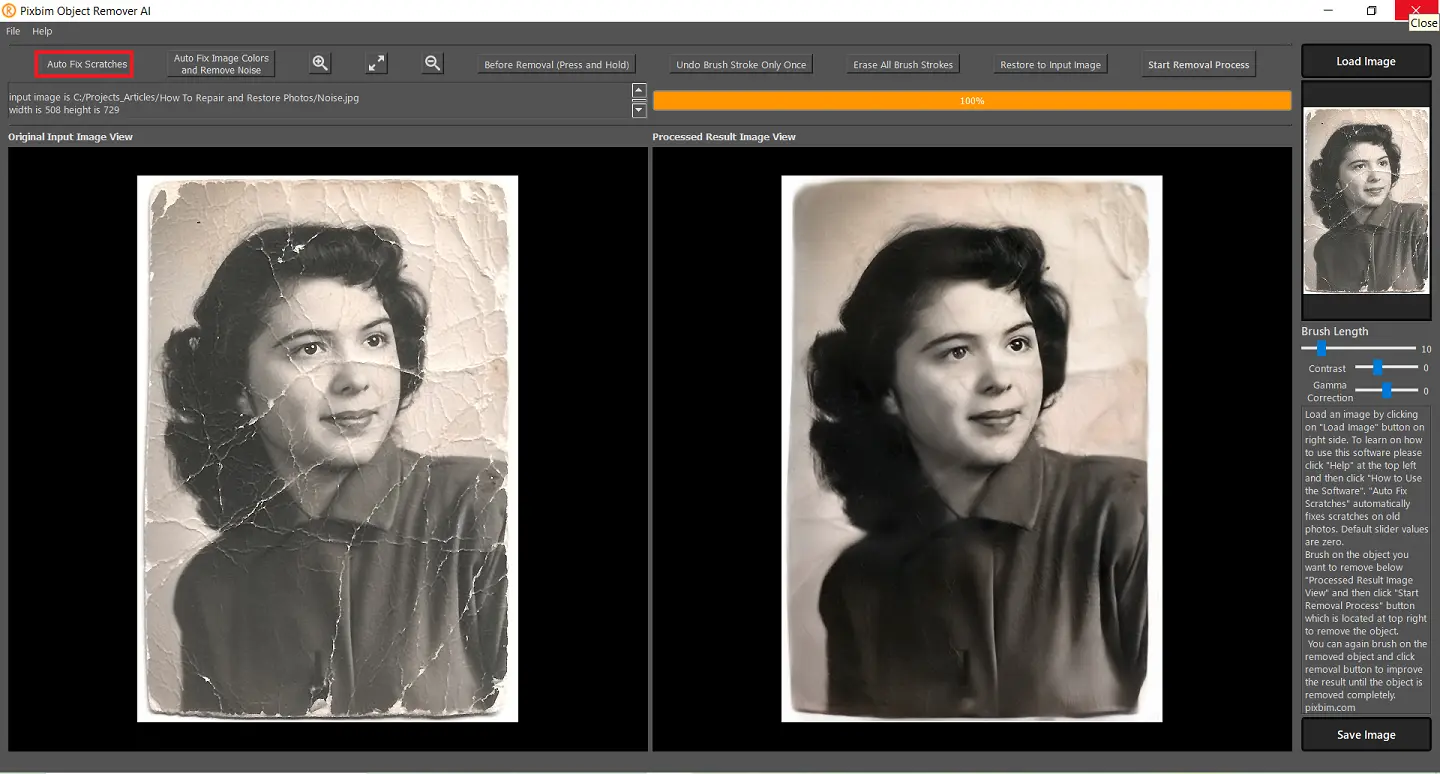
Step 3: Click "Auto Fix Scratches" to automatically remove all scratches in photo
As soon as the image is loaded into the software, click on "Auto Fix Scratches" from the taskbar just below the menu bar, it starts working. This might take 1-2 minutes, depending upon the severity of the damages in the image.
Auto Fix Scratches automatically removes all the scratches from the image using AI. The scratched photos are repaired using this tool. Once the Pixbim is done reviving your old photo, it will display it on another pane such as below:
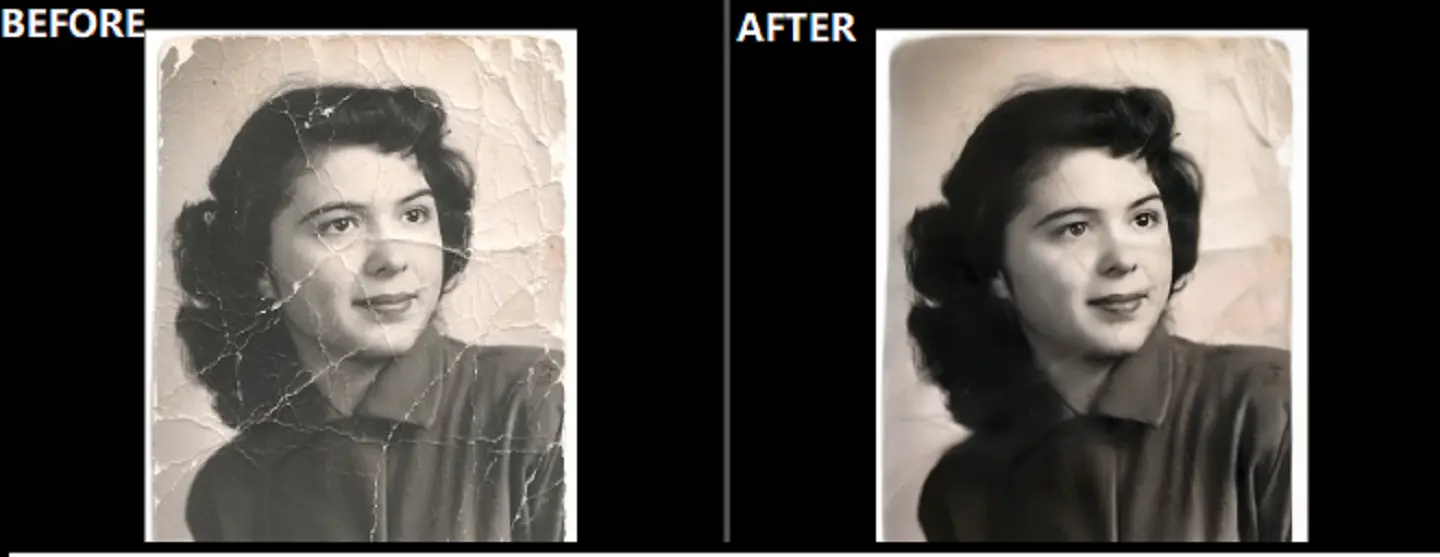
Before and after photo of input image repaired using Pixbim Object Remover AI
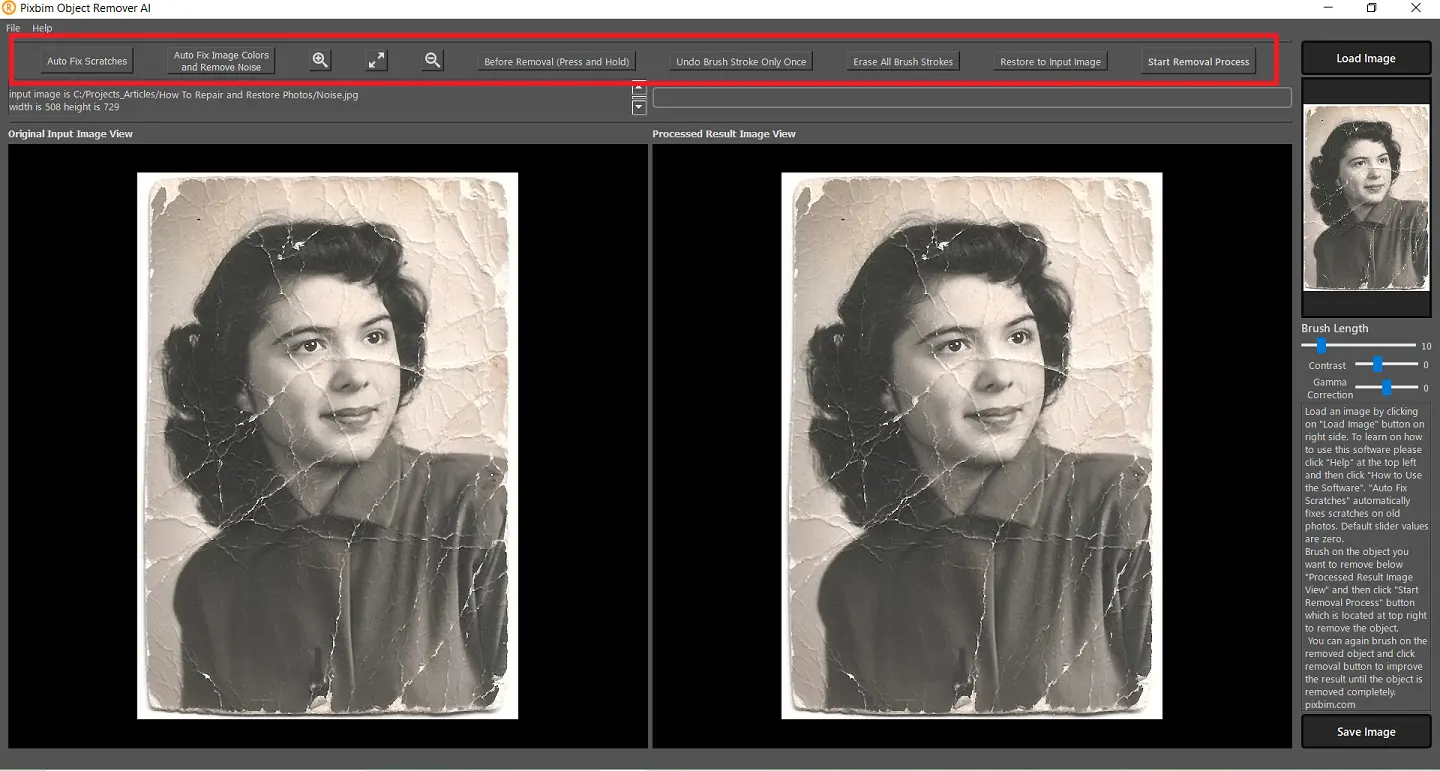
Step 4: Click "Auto Fix Image Colors and Remove Noise"
Moving onwards, click on "Auto Fix Image Colors and Remove Noise." This helps you to improve the color and reduce the noise in the damaged photo with just one click with the help of AI. You can view this option on the taskbar right next to the "Auto fix Scratches." Once done, you can then click on "Stop Auto Processing" to stop the processing of the image.
Noise and color are fixed on the photo automatically in one click using AI
Step 5: Manually Editing (Optional)
Users can even take control of their own hands. They have the opportunity to edit their photos, change color quality, contrast, and much more. The users can avail of this by using the bars on the right side of the window, under the “load image." As shown in the image below:
Furthermore, you can even change the brush size according to your requirements and its hardness. Moreover, If you're painting a colorful picture, try increasing the hardness to 100% before applying the paint. Additionally, the users can erase or undo the brush strokes and also magnify the image through the taskbar below the menu bar. You can exit the brush tool by clicking on the “Close Brush Tool” from the taskbar once done.
Step 6: Manual Editing options (Optional)
Pixbim provides its users with the option of color correction by enabling the "Brush Tool." You can choose this option from the menu bar. To further improve the photo, brush on the image and click on the "start removal process button" at the top right.
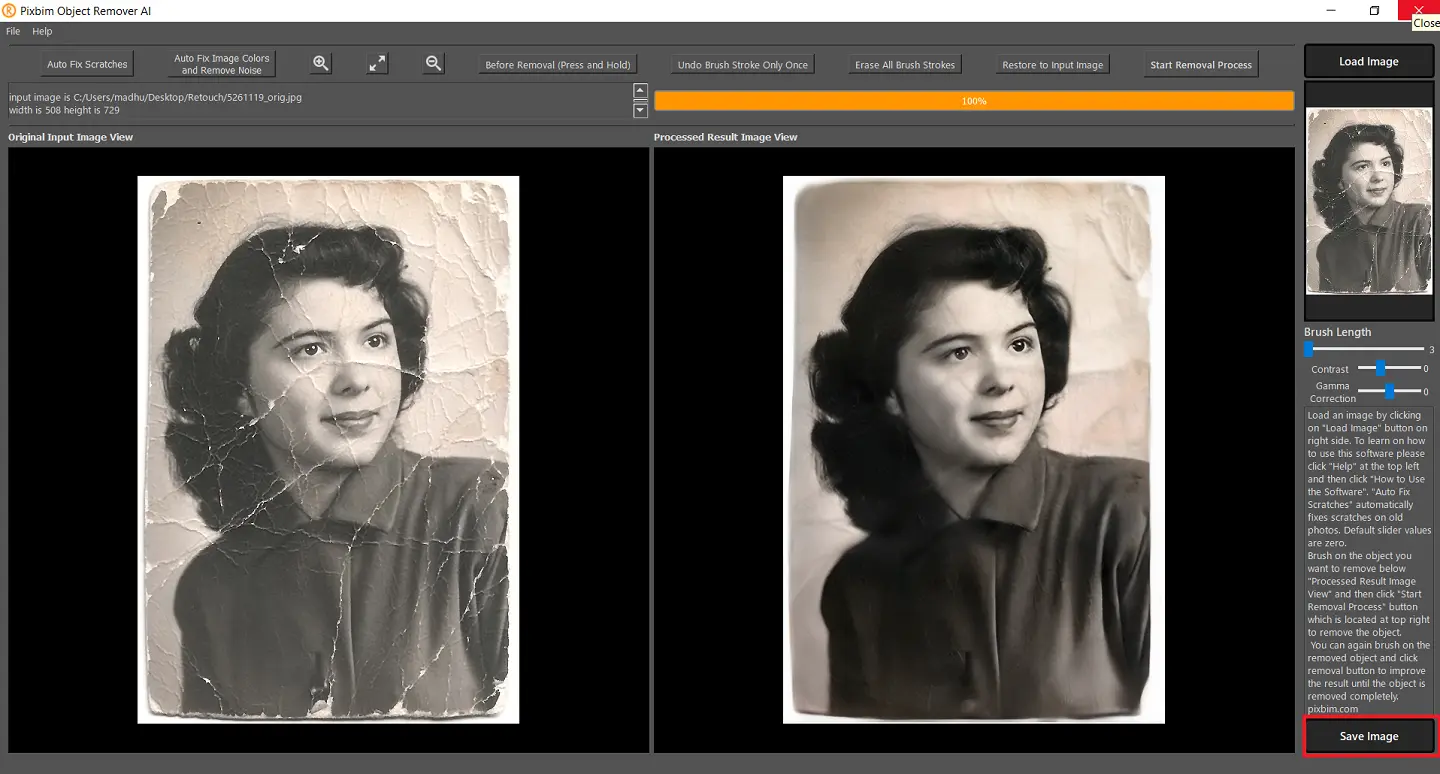
Step 7: Save the Output Image
Once done with all the editing, you can save your image by clicking on "Save." The option is available on the right lower corner of the screen. A dialog box appears once you click on the option that allows you to browse the location where you want to save your file.
After saving your renewed image, you can close the software or load a new image by repeating all the steps described above.
About Pixbim
Pixbim is the most outstanding Artificial Intelligence (AI) solution for colorizing photos currently available on the market today. Using this program, users will be able to utilize artificial intelligence to colorize old family black and white images using deep learning technology. The good news is that Pixbim customers will get free upgrades for the rest of their life as long as they own the product.
In Photoshop or comparable image-altering software, amateurs have almost little chance of succeeding due to the high level of creative and technical skill required. Fortunately, AI software may be utilized in a simpler fashion. Thanks to Pixbim Object Remover AI's new game-changing critical capabilities, users may now submit a damaged, scratched photo and have the output of a scratchless, no tears, reduced noise photo, the same size as the old photo.
Final Verdict
You can use Pixbim to mend damaged images and colorize black-and-white photos all at once, rather than depending on a device's built-in features. Your data will not be affected in any way since the tool is free, easy to use, and fully secure. Here is the link to how-to-repair-photos
More from Pixbim